I finally have the heater control valve and the heater fan motor sorted out. I've been working on these two components for weeks, a half-hour here, a half-hour there - just whenever I have the time. The foam gasket had melted all over the heater control valve causing a tremendous mess, and the pipes had been painted over. Quick work with the Dremel rotary tool revealed a pleasant surprise - copper pipes on the heater control valve! All the moving parts and internals were also cleaned up using electronic contact cleaner and Q-tips. Why the electronic contact cleaner? There are no electrical parts in the heater control valve, but the electronic contact cleaner was all I had so I decided to give it a try. It works great, especially in dissolving the melted foam away. All it needs now is some machine oil on the moving parts and it's good to go.
Heater Control Valve - Before:

| Heater Control Valve - After:

|
A few weeks ago, while disassembling the heater core, I discovered that the capillary sensor cable from the heater control valve was broken. Turns out that this heater control valve must have been a replacement unit at some point in the Volvo's life as it has a capillary sensor that is still in tact. The first photo above shows this capillary sensor cable with the "bulb" on the end. The theory is, the capillary cable has ether in it which expands as it exposed to heat, and thereby toggling the valves to open or close slightly to regulate the flow of heated coolant through the heater core. Well ... I've read some feedback on the 1800list that this whole contraption never really worked that well anyway in "automatically" regulating heat, and you're better off just regulating it manually via the heater control cables. I decided to put this to the test and submerged the capillary sensor cable into a pot of water over the stove and slowly heating the water to a boil. Yup - doesn't work at all! Don't bother routing it back inside the heater box where it originally belongs. Just roll the capillary sensor cable up into a neat coil, and tuck it out of sight when replacing or reinstalling the heater control valve. You'll pass out from heat exposure long before the heater control valve decides to work auomatically - case closed!
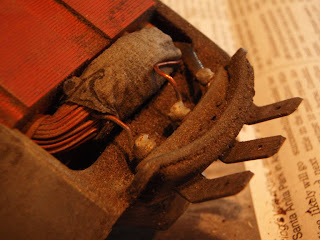
Heater Fan Motor - Before:

| Heater Fan Motor - After:

|
The heater fan motor - now this thing was a piece of work! Everything had siezed up! The fan would not rotate and there was a thick layer of dirt on everything. I emptied half a spray can of electronic contact cleaner into this sucker before things started moving again. Q-tips ... lots and lots of Q-tips - that's all I have to say. I need to get some machine oil in it to lubricate the moving parts and I won't know for sure if it's going to work until I hook it back up to the car, but I have a feeling this one's going to be a winner!


No comments:
Post a Comment